My first airfryer was a gift from my sister because she does not know how to make full use of it. My son was the first one who experimented cooking with it and I got hooked. When he moved out, I gave him that unit and got him to buy me a unit in larger capacity since I am cooking for three in the family.
Many people think that an airfryer is just a gimmick. I can only say that they are just not playful enough to create interesting fusion of Asian or Western dishes with it. I use my airfryer to:
-thaw and cook frozen food and ready to eat meals. -reheat food and continue to keep it warm by leaving it inside. -deep fry frozen food without oil. -toast my bread, pancakes, pizzas and wraps. -melt my butter. -make my deep fried food crispy again. -roast. -bake. -grill.
Any dishes you can cook in an oven can be cooked in your airfryer and in a shorter time too, even though you have not preheated it. It is more economical to use an airfryer, especially if, you have a smaller portion to bake. This video gives you a general idea how you can use the airfryer to cook which is possibly why you think cooking with it is such a hassle.
However, you may reconsider using an airfryer if you use the tips I shared below:
Try to avoid cooking food directly in its basket by using a metal container.
From the video you can see that the ingredients are placed on the basket to be cooked. I don't do that. I have many round stainless steel food containers with lids like these.
They are handy for storing food in the refrigerator and for steaming food over a pot of soup or in my airfryer. Most of my meat are marinated ahead and stored in such round metal containers. When it is time to cook, I just remove its cover and place the container on the basket to airfry. Once the meat has thawed enough, I separate them to cook further. By doing that I save the time and hassle of cleaning up a my heated airfryer to cook the next dish,
Spread oil in your metal container.
If I am cooking room temperature raw ingredients like meat or fish, I will spread garlic oil in the container before I place the food inside it to cook. The oil will prevent the ingredients from sticking to the container which will make it easier for me to turn them over to cook further.
To avoid burning raw minced garlic, use garlic oil instead.
I prefer my greens with sauce, so, I will not consider cooking them in an airfryer. Also, instead of adding minced garlic in to airfry, consider using garlic oil. You make it by deep frying minced garlic in a pot of oil. When it is time to cook, just place the ingredient in a metal container and spread 1-2 tablespoon of garlic oil over it before airfrying.
Use a piece of bread to catch oil drips.
It will be easier for you to clean your airfryer if you place a piece of bread below the basket to catch oil dripping out of food like bacon or fried chicken you are airfrying.
Don't wash the airfryer to cook the next dish.
You can use a piece of kitchen towel to wipe down and remove any bits of food still sticking to the basket. That will also help maintain the heat of the airfryer to cook the next dish.
You can easily find recipes for dishes that you can cook in your airfryer. Webspoon World shared 7 such recipes that have gone viral on TikTok that should interest you to try making.
As a frugal mom, unless I am cooking Bak Kut Teh, I will not consider using spare ribs to boil soup since it is the more expensive cut compared to soup bones or chicken carcasses. Moreover, I boil soup on a daily basis.
On days when I want to cook a dish with spare ribs, I will add about 6 to 8 pieces of them to the pork or chicken soup I am boiling for the day as this will help me save time. I like it that the additional spare ribs added will also enhanced the flavour of my soup.
If you do not plan on making soup or soup stock, you can just boil the spare ribs in a pot of water. You want to boil them till they are soft enough to bite into but not falling apart, which is about 30 minutes on high heat or about 45 to 60 minutes on low heat.
Once they are ready, you can remove them from the soup or stock and stir fry them in a wok with:
-8 to 10 table spoons of water (or soup/stock) -1 Tbsp of white or brown sugar (or honey) -1 Tbsp of garlic oil. -1/2 Tbsp soya sauce. -1/2 Tbsp oyster sauce -Dash of black or white pepper or -1 Tbsp BBQ Sauce
Stir fry till the liquid is reduced and the sauce thickens to glaze the ribs. If you have been too heavy with the sauce, just add more water. You can then thicken the sauce by whisking together 1 tablespoon of corn starch with 2 tablespoons of water to create a slurry. Once the sauce starts to boil again, add the slurry in bit by bit while stirring till it thickens.
Here is another way to reduce cost to purchase a larger quantity of spare ribs if you plan on cooking for more people to eat. Boiled spare ribs can be kept in the freezer. Each time you use them to make your soup stock, you can store them in an airtight container. Once you have accumulated enough in your freezer, you can thaw them to marinate for at least an hour or store it overnight in the fridge a day before you airfry them to serve. Watch this video to see how it is cook in the airfryer.
You can watch the video from the beginning if you would like to know how the Char Siu Sauce (BBQ Sauce) is prepared and how it can be used to cook other dishes. These are the ingredients used in the video to make the Char Siu Sauce (BBQ Sauce) for 1kg pork spare ribs:
This is how you prepare the spare ribs to airfry.
If you plan on using BBQ sauce from Lee Kum Kee, watch this video and learn some Cantonese phrases along the way.
This sauce can also be used to make char sui with the following parts of the pig:
-pork butt or shoulder -pork collar -pork belly (very fatty) -pork loin (leaner option can turn out dryer when cooked)
Every morning your dad makes breakfast for us. This morning, it is sardine sandwich make with our non-stick electric sandwich maker.
To make the sandwich taste better, he spread butter on each piece of bread before spreading the sardine. This is how how the sardine sandwich will turn out.
If you are able to get up early enough to make this sandwich for us, this is my recipe for the sardine.
I like to add Worcestershire sauce because its vinegar and tamarind content make my sardine taste more sourish, which is the way I like it. If I run out of it, I will use white vinegar.
I am very particular about the can of sardine I use. Currently, my go to brand is from Lotus as the sardine is still flaky when it is being mashed up with a fork.
Don't buy the other house brand under Value, they also carry. It is too mushy for my liking,
One can of sardine cooked with onion can be stored in my 420ml glass container which I received as a gift from Signature Market.
It is safe to store the cooked sardine in the refrigerator for 3 to 4 days in an airtight container. It can be eaten with rice too. This is what is left of the sardine after the sandwiches have been made.
Whether or not you make use of an electric sandwich maker, these are other ingredients you can add to enhance the flavour of your sandwich:
-sliced tomatoes. -sliced cucumber. -fresh produce like coriander, lettuce, celery or avocado. -pickles. -sliced or chopped hard-boiled eggs. -cheese. -sauces like mayonnaise or chilli sauce.
This is how you use an electric sandwich maker to make your sandwich.
If you do not want to use the electric sandwich maker, you can toast my home made bread with sardine spread over it in the airfryer. It will taste even better if you roll the sardine up in puff pastry to airfry. Making your own puff pastry takes time. You can buy them ready made. This is my go to brand.
You can learn ways to roll or fold up your pastry puff with sardine or any other ingredients you would like to try using by watching this video.
My children know that I love eating cheese cake because every year, on anybody's birthday, I will be buying cheese cakes to celebrate with the family. That is, until I discovered that they don't love it as much as I do. So, no more buying cheese cake.
But I can try make my own in my airfryer with milk and a slice of cheese.
These are the ingredients required and steps to make it:
250ml Milk 1 Egg York
25g Cornflour
5g Castor Sugar (or add more to taste)
-mix the above ingredients well
-sieve mixture into a pot
1 slice of cheese (optional)
-add cheese and cook on medium heat -stir constantly
-turn off heat once it is thick and smooth
-pour curd into a container with lid
-when cool, chill covered in fridge for 3 hours -dip knife in water to ease cutting
-cut curd into finger size slices
-serve them cold as custards
To bake
-place slices on a baking tray lined with parchment paper
One Egg Yolk Beaten with One Tablespoon of Water -apply egg wash (can use yolks only or whites only by altering the amount of water)
-bake for 20 mins at 200°C (392°F) or till top caramelised
-cool down to serve
Can be offered as finger food for baby above 12-month.
Here is another cheese baked in toast recipe I would like to try.
Sengkuang (yam bean) is also a weekly buy because my girl loves eating it.
I can only cook it when my bike shop is closed as it takes time to prepare. As sengkuang can also be used to sweeten soup, I usually cut out a few pieces to store in the freezer.
This is how it looks like cooked with -garlic oil -salt -soya sauce -pepper
As you cook it, the sengkuang will soften and its juice will drip into the sauce. Turn the fire down low to simmer still the sengkuang is tender enough to eat. Add water if the sauce dries up. Leftover sengkuang can be made into popiah by rolling the ingredient in spring roll pastry.
I do not discard the leftover sauce from this dish as it can be used to flavour rice or porridge. The spring rolls can be deep fried but I prefer to use the air fryer.
If you have the time, you can even make your own wraps.
I will also share with you the traditional way for cooking this yam bean dish which I found on Huang Kitchen. This is also the way my mother-in-law taught me to cook it. She also added dried shredded squid, which she soaked in water to clean and soften. This is then added to the fried dried prawns to fry before the yam bean is added. I started cooking it without the seafood products when my husband was down with Graves disease and should avoid eating them. You can see the adaptations I have made to it from this chart.
Have you ever purchase green, red and yellow peppers at the market? It is very difficult to find them in similar sizes. So you are likely going to have more of one than the other to cook in your dish.
I used to get my source of peppers in similar sizes from TESCO till Lotus took over. For a family of small eaters, I can cook two different dishes with them. One of them will be Sweet and Sour Pork. If you cut peppers the way I do, you will notice that their curved ends are usually thicker in porpotion. These are the parts that I used to cook this dish.
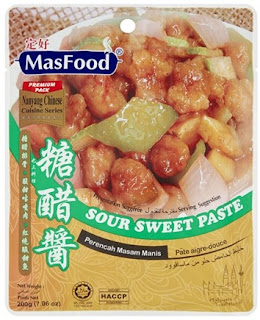
I tried cooking it with a ready made pack of MasFood Sour Sweet Paste but I did not like how it turned out.
I still prefer it cooked with the following liquid/sauces:
-Mahsuri Spicy Sweet & Sour -Tomato Ketchup -Plum Sauce -Juice from canned Pineapple Slices -soya sauce to taste -*Worcester sauce (only if the sauce is not sour enough after cooking)
I usually buy pork tenderloin as the meat is tender. The pork used in this dish should be deep fried but I do not like the idea of using lots of oil. So I sliced the tenderloin into 1 finger thick cutlets and pound it flat with my meat mallet. I discovered from watching how Koreans cook in their restaurants that it will be less messy if you place a plastic over the meat or add corn starch to it before pounding.
I then marinate it piece by piece in my magic sauce:
I add cornstarch to the meat once it is thoroughly mixed with the sauces. The marinated meat can be stored in the freezer till it is time to be used.
As the meat has been pounded thinly, it does not require a lot of oil or time to cook. For the sweet and sour dish, I only need 3 peices of pan fried cutlets but I usually fry more so that it can be eaten like pork chop for lunch.
For dinner, I will use a pair of scissors to cut each cutlet into 1-2cm strips.
When it is time to heat them up to be served, I can break an egg over the meat to fry before serving, thus changing its flavour.
I tend to cook more sauce than is required for the dish.
I can use it to add flavour to my:
-leftover rice and prevent it from drying out when I reheat it. -pork cutlets -deep fried chicken -fried fish.
-fried rice.
If I do not have the time to prepare the pork to go with this dish, I will use stored bought chicken nuggets. I air fry a small portion of them with garlic oil in a round metal container until both sides are crispy, which is for about nine minutes. Crispy Chicken Finger is our favourite choice to go with it.
As I do not like the idea of serving the same dish for lunch and then dinner, I sometimes use the ingredients as toppings for the Four Cheese Pizza 285g that I bought from TESCO/Lotus. I quarter it up air fry two slices at a time for seven minutes in the air fryer.
You can see 2 methods for preparing the crispy pork for the sweet and sour dish in the following table.
You can see how the cutlets are prepared and deep fried for cooking "Crispy Sweet and Sour Pork" from this video.
These are the ingredients the chef used to cook the sweet and sour sauce.
This is how the Sweet and Sour Pork dish with bell peppers, pineapple and onion should be cooked. The deep fried pork should be the last ingredient to be added to the sauce to prevent it from becoming soggy.
Other ingredients I have added to cook it are:
-1 cucumber deseeded and cubed -1 tomato deseeded and cubed